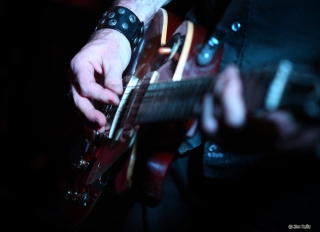
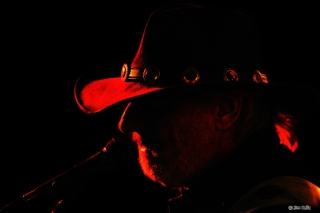
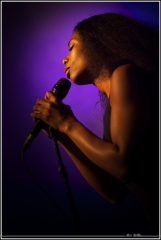
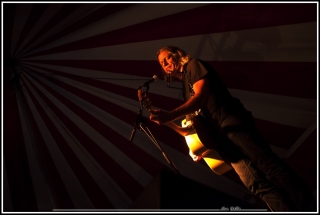
Not that I wish to claim that I’m the authority in concert photography, certainly not. Or that I have tons of experience. Certainly not. But I did figure out a few things myself since there isn’t much out there on the web, and I see a lot of people going through the same beginner’s mistakes and misbeliefs as I did, so I thought I could just as well pile up a small list. Perhaps in a few years this’ll turn out to be “part I”, who knows.
1. Invest in high aperture objectives
Yes, I know, it’s not the equipment that makes the pictures, it’s the photographer. But in a rather dark environment with moving subjects the more pricy f/2.8 zoom-objectives are a must, you need to capture all the light you can get. An alternative might be a relatively cheap 50mm or 85mm f/1.8. Less flexible than the usual 70-200mm zoom, but also with less impact on your wallet… Besides, the 85mm is a sound investment for portraits anyway.
2. Don’t let high ISO scare you
Yes, it will be grainy. But who cares? In a concert you’re not making crystal clear portraits, you’re capturing an atmosphere. If that is in a dark grubby room with only a couple of spotlights, behind a café somewhere, then grainy pictures will even be what you want. A high ISO is often the only way you can get by, even with only a barely acceptable shutterspeed and a giant aperture. I often start at ISO 1600, and use it up to 6400.
6. Underexpose
That’s right. From 1/3 to a whole stop. And maybe you want to bring down the contrast too, I have a “user setting” on my camera specific for concerts. The reason is that most likely you’ll have extremes on your subject, too much light on one side and barely enough on another. Underexpose and you won’t have whiteout faces (or tomatoes for heads, as the red lights are usually the harshest), and you will have richer colors. Besides, later in Photoshop you can adjust that contrast anyway – but you cannot create something from an overexposed spot. White is white.
4. Leave your flash at home
Tempting as it may be to overcome the poor lighting conditions, never use a flash. Audience won’t like you, artists won’t like you, and you won’t like your pictures. All you’ll manage to do is make the umpteenth pale cold fanpic that wipes away all the atmosphere made by the light-effects.
5. Ask
Some locations or organisations won’t just allow you with your big camera. My experience is that a simple request often allows you even access to the area in front of the stage. Sometimes there are rules (only the first three songs, no flash), sometimes not. Some artists allow you to come on stage even (in a dark corner in the back of course), some won’t. I never discuss rules, nor refusals. Being a pain in the backside -or being perceived as one- is the surest way to get a reputation, and to not be allowed anything anymore.
3. Move around
The fans are the ones standing in the middle on the first rows. They want to be close, they don’t care whether all their pictures are with a microphone in front of the singer’s face. But some singers always hold the same hand on the microphone, some turn their heads mostly in one direction, a guitar player typically holds the neck of the guitar slightly in front of him and rotates body and face slightly in the other direction – and even if you know all this you might just get a wonderful picture from the “wrong” side. The story you’re telling with your pictures is simply more complete if you have pictures from different positions. Oh, you feel uncomfortable standing in front of people? They won’t mind, just because you move around.
7. Use RAW
You are using RAW, aren’t you? Your whitebalance will be all over the place since the light conditions change every second, you’ll want to adapt your exposure, add fill lights (or not), and JPG simply doesn’t allow you to do all this properly. I know, I know, another investment: larger disks…
8. Don’t just stand there
If you want to capture the atmosphere, you’ll want some dynamic pictures. Sit on the floor looking up to zoom in on the artist’s face, kneel, sit on a speaker, lean against a post. Experiment with extreme wide angles, try to focus on something in front and keep something else blurred but visible in the background, tilt your camera. Variety is key here, and don’t do the effect just for the effects. I’ve seen many series that are all in the same tilted angle, all with the same slightly extreme Photoshop-effect. You stop thinking “oh, cool!” after the 4th similar picture…
9. Use the light
The spots are probably a nightmare, certainly today with stroboscopes and moving spots and all sorts of effects. But you can use them. Watch for a pattern, perhaps that beautiful backlight comes back. Perhaps you can capture your artist in a ray of light. Perhaps the effects plus the smoke create an image you never expected. A normal exposure may create a sea of different colors around your band, and underexposing may give that one spot on one person a classy effect.
10. Pick your focus
You don’t have the time to try and try again until the autofocus focuses on what you want it to focus. No, set your camera to focus on one point, the one you select. Whichever you feel most at ease with, you’ll have to focus-and-reframe anyway. And while on the subject of focus: do you really want the part that is in focus to be smack in the middle? Perhaps you can get the viewer’s attention with what is in focus, and let them then discover what is just behind that, out of focus.


its incredible how fascinating it is for me to pay a visit to your really typically.